Rabu, 31 Oktober 2007

Bamboo and Artichoke Chicken [Paleo] [Low Carb]

I always get questions on what I eat for lunch. Specifically, I'm asked for some quick gluten, dairy, nut, corn, soy, egg, blah blah free low carb recipes. This recipe will last me a few more lunches. I'm a multi-task lunch maker; I either make them while preparing dinner or while cleaning up after dinner. Recipes like this are especially easy since I can concentrate on another meal while it cooks.

This recipe obviously has meat since I need a higher protein diet, but it is free of all nuts, corn, soy, eggs, red meat, flax, tomatoes, gluten, wheat, and dairy (and many other foods I can't think of at the moment). What you see is what you get :) If you have trouble with "key" ingredients such as onions, please feel free to omit them or substitute whatever you like. Truly, there are no real "key" ingredients! Even this recipe could have chicken completely swapped out for some fresh tuna steaks, mahi mahi fillets, turkey breasts, or try a high protein vegetarian black beans, lentils or quinoa twist. Experiment and please share your results!

I hear from many people that they just don't have the time to cook. I understand. I hope some of my recipes can provide a good basis for inspiration for healthy food, lifestyles, and good time management since I have found that my diet and exercise are the cornerstones of my health and productivity. Cooking is my love and hobby but also a necessity and priority, but don't think just because you're not a stay at home cook or star chef that you can't do the same. Even my "most difficult" recipes are ones that anyone can do (well, given a little practice in the kitchen). Just ask Jon: he is occasionally forced from dishwasher to dinner maker when I'm taking a day off :) Anyways, enough motivational disclaimers and onto the food!

Low Carb Bamboo and Artichoke Chicken [Paleo]


4 boneless-skinless chicken breasts
1 can artichoke hearts, drained
1 can bamboo shoots, drained
sea salt and pepper
3-4 T extra virgin olive oil
2-3 slices onion
4 sundried tomatoes, chopped
5-6 cloves fresh garlic, minced
5-6 large collard leaves, chopped (optional)

Seasonings (to taste):
garlic powder
Italian seasoning
dried rosemary
crushed red pepper

An aside on cooking method:
This is the first recipe where I was able to use our brand new Saladmaster oil-core electric skillet. Mom and Abba Jockers (Jon's family) blessed us with this as an early wedding shower present to help me more easily and quickly prepare my food. This super sexy appliance is more than just some electric griddle or frying pan (and the price tag sure reflects that!); the insulated oil-core of the skillet allowed me to cook the chicken at much higher and even heat (350 as seen below) than I could on the stove top which drastically lessened the cooking time and even gave a nice browning to the meat. The quality of the stainless metal assured that the chicken and onions did not stick even without added fat. If food does stick, a simple rinse does the trick. Jon loved the easy cleanup - I think he's spoiled now! I added olive oil since chicken alone is too low fat for my body; my body works much better on a high protein, veggies, and good fat diet. I cooked this whole meal in the skillet while I made Jon's lunch, cleaned out the fridge, made a Crockpot beef roast for later tonight, and cleaned up. The skillet really helps me multitask and make our food asap since otherwise I am trapped in the kitchen all night. You'd think one could be overwhelmed with kitchen appliances, but I manage to make use of mine on a weekly basis preparing meals. Next on the list: Saladmaster Crockpot ...


Our fantastic new oil-core Saladmaster electric skillet cooking up the chicken and onions.
Thanks Mom and Abba Jockers!!

If you do not own an electric skillet, then you can use a frying pan and cook this all a little longer since the stove top heat is much lower. If you prefer, this can be made entirely in a Crockpot with a 4-6 hour low-heat cooking time frame. I used our electric skillet preheated to 350 degrees. If you have a normal skillet or even a teflon-coated skillet (these are not ideal, I'll talk about teflon later), then you may wish to spray your pan with nonstick cooking spray and turn to high heat.

Slice the onion and add it, the chicken breasts, olive oil, and seasonings to the skillet. I grilled the chicken in the skillet at 350 degrees (high heat) uncovered for about 10 minutes per side. The meat had a nice brown crispy "crust." This also allows for the onions to caramelize, making them naturally sweet and soft.

In the last 5 or so minutes before the last chicken side is finished, add the bamboo shoots, collards, and artichokes hearts. Stir and let the bamboo and artichokes form a slight brown hue after about 6-7 minutes. If you like your veggies softer, turn the heat down and let simmer for a few more minutes. I basically threw the ingredients in the pan, ignored it for the most part, and came back to flip the chicken and add the veggies once the chicken browned. Serve hot with a dash of sea salt and drizzle of extra virgin olive oil for a low carb healthy meal.

Cindalou's Kitchen Blues: Healthy Celiac / Coeliac Gluten and Dairy Free Recipes

Selasa, 30 Oktober 2007

Quick Coconut Grits [Vegan]


1/2 c. dry organic yellow grits
1 1/2 c. water
1/2 c. lite organic coconut milk
1/2 c. shredded organic no sulfur coconut
2 T. Earth Balance light Vegan butter (or extra virgin olive oil)*
dash sea salt
parsley for garnish

First, bring water and grits to a boil in a saucepan. Stir in the sea salt, vegan butter (or olive oil), coconut milk and about half of the coconut flakes. I reserved the rest of my coconut flakes for adding after the grits were finished so there was a nice mix of somewhat crunchy and some chewy flakes. All of the coconut flakes you add in the beginning will absorb moisture and become softer, so adjust the coconut amount and timing to suit your texture preference.

Cover the grits and simmer on low for 5 minutes. After the grits are finished, stir in the leftover coconut flakes and serve topped with parsley. You may wish to add a dash of coarse sea salt before serving. These were great and a nice variation on our weekly breakfast grits.

*Use extra virgin olive oil for soy free since many butters and margarines have soy oil in them.

Cindalou's Kitchen Blues: Healthy Celiac / Coeliac Gluten and Dairy Free Recipes

Senin, 29 Oktober 2007

Flourless Dark Chocolate Espresso Cake [Low Carb] [Paleo]

Gluten Free Dairy Free Healthy Chocolate Cake

This absolutely divine chocolate cake is a birthday gift for Mom and David. Happy birthday guys!! This recipe comes from my somewhat-recent obsession with low carb chocolate desserts and from Karina's Flourless Chocolate Cake recipe. Thank you Goddess! I am really excited to try this ... if there is any left after the birthday folks devour their share :) Karina, I hope you are doing better. I know you can't have this recipe with the eggs and probably not even the vegan butter (?) :(

Since I was always one of those kids who failed the basic "read and follow directions" quizzes, I decided to alter Karina's basic recipe to be lower carb. I omitted the organic cane sugar entirely and substituted Stevia, unsweetened pineapple juice, a tad of organic brown sugar for texture, and cinnamon instead. I'll tell you that the batter is fantastic, so I think it will be sweet enough.* I also decided to lump in extra espresso grinds as I blended the batter since fresh espresso grinds can't possibly make it worse. Can't possibly, no way jose.

*This cake is absolutely delicious - it has a rich, fudge-like consistency and deep dark chocolate taste. I will definitely be making this again - possibly for our wedding.

Chocolate Espresso Heaven by the Slice
1 12 oz bag Sunspire unsweetened dark chocolate chips (or your favorite dark chocolate bar)*
1/4 c. hot fresh espresso **
~1 T. fresh espresso grinds (optional, but man its good)
1 T. organic vanilla***
1 T. cinnamon
4 heaping T of unsweetened baking cocoa powder
1/4 c. (powdered) Stevia
1 T. organic brown sugar
1/4 c. unsweetened pineapple juice
6 free range organic eggs, room temperature
2 sticks Earth Balance Vegan light butter, room temperature (I know that's a lot, but it makes the consistency for a flourless cake. See the bottom for a butterless variation.

My first remark is that I used the Vita-Mix for the whole grinding and mixing process. You can use a food processor or your blender if you prefer. The Vitamix made the preparation very fast and fun. I love to watch it go!

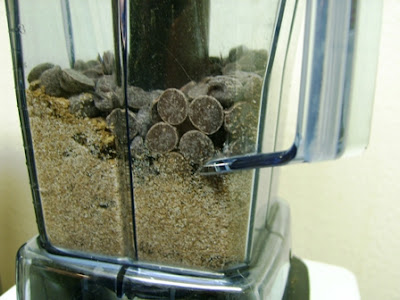
Preheat the oven to 350 degrees and coat either two cake pans or preferably a large springform pan with nonstick spray. First, add the Stevia, brown sugar, cinnamon, espresso grinds, and chocolate chips to the Vitamix. I did this as I made my second double shot of espresso so I just so happened to have extra grinds to add. It is not as if I used the cake as an excuse to make more espresso, nor as if I used the espresso as an excuse to make the cake - nope. In fact, if you believe that, I have a bridge in Brooklyn to sell .. call me. Anyway, grind the chips and dry ingredients up for about 10-15 seconds as shown below. I did this for a very sort time since I wanted to preserve a few whole chips for the cake.

Vita-Mix chocolate cake recipe
grinding the chocolate chips

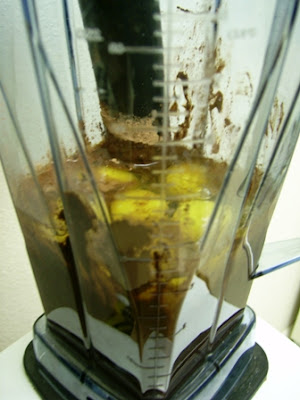
Add the pineapple juice and hot espresso. Blend for ~5 seconds until creamy. Add the cocoa powder, vanilla, eggs, and vegan butter. You may wish to scrape off the sides with a spatula before you start blending again to make sure no dry powder is stuck. I just cracked the eggs and poured everything right into the Vitamix as shown below, but if you're not using the Vitamix, beware. The Vitamix has a very large container ( ~8 c.) which makes it perfect for batters like this, smoothies, and soups. However, your blender or food processor may not be this large so be careful not to overflow it.

Vita-Mix fudge recipe
all batter in the Vitamix, ready to rock n' roll

Replace the lid and mix on variable medium-high for about 30 to 45 seconds until smooth. Again, you may need to use the spatula (or the Vitamix damper) to scrape the sides as you go.

Pour the batter into the greased springform or two cake pans. I made the mistake of only using 1 cake pan and it almost overflowed. We had some tense moments baking, having to quickly slide a cookie sheet under the cake pan to prepare for an overflow. After all, it didn't overflow - thank goodness! If it had, I probably would have been a moron and tried to lick the bottom of the oven after it cooled since it smelled so good :)

Gluten Free Dairy Free Healthy Chocolate Fudge
I said pour and scrape out the batter Jon, not eat it!

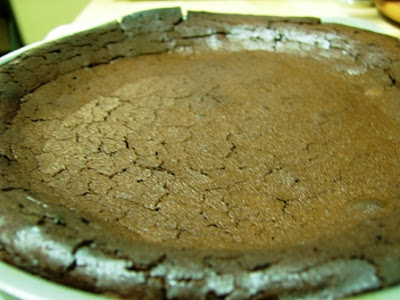
Bake at 350 degrees for 45-55 minutes (for 1 cake pan). You will need to shorten the time for 2 pans - I estimate about 30 minutes or so. Bake until the middle is set and a toothpick comes out clean. Remove from the oven and set aside to completely cool - hands off (that's a reminder for me). Once cooled, cover and refrigerate it for at least 3 hours or longer so it is nice and firm, thick, and deliciously lip-smacking chewy (think fudge texture but better). My cake edges fell a little but it isn't a problem. Karina recommends pressing the cake gently with the spatula to even out the surface after cooling, but I am too lazy for that so, as I like to say, to each his his/her own. Serve cooled with obnoxious birthday hats :) The hats are optional. I wonder if Burger King still gives out paper crowns for birthday kids?

Gluten Free Dairy Free Healthy Chocolate Brownies
GF DF Chocolate Cake

No butter flourless dark chocolate espresso cake:
The butter recipe is the exact same, minus the butter. I made a tiny single serving of the batter without the vegan butter as an experiment. It baked for about 12 minutes. Omitting the butter does change the consistency by a fair amount. This variation is sticky and reminiscent of very moist fudge, but still tastes phenomenal. I think both recipes make delicious desserts and I am going to make both again.

Gluten Free Slice of Chocolate Fudge Cake
No butter GF DF chocolate cake

Rants/ Sidenotes:
* These are gluten and dairy free, but always read the ingredients anyways

** I used freshly ground Newman's Own French Roast beans. They are organic, free trade and shade grown (and on sale at Harris Teeter, yay!)

*** Watch for sales on the fancy organic spices and extracts. We found this organic fair trade vanilla on sale and with a coupon at our local co-op. Getting fair trade spices, herbs, and extracts is important if you can manage it. Supporting the local farmers is vital since usually large haciendas or companies take over the market and either under pay and overwork, or put the locals out of business. Also, the quality of more local fair trade products is better in my experience. Judge for yourself, but just so you know. I might do a post on fair trade issues later.


Cindalou's Kitchen Blues: Healthy Celiac / Coeliac Gluten and Dairy Free Recipes

Jumat, 26 Oktober 2007

Creamy Tomato Butternut Squash and Mushroom Chicken [Dairy Free] [Paleo]


4 boneless, skinless chicken breasts
1 large (27 oz) can low sodium organic whole peeled tomatoes (I used the Muir Glen brand)
14 oz (1 can) organic unsweetened "milk" of your choice*
3 cloves fresh garlic, minced
1/4 c. dehydrated (or 1 lb fresh) portobello and shitaki mushrooms
1 medium butternut squash, cooked (with skin)
~2 T. dry red wine or cooking sherry (optional)

Seasonings:
sea salt and pepper
tarragon
Italian seasoning

Slow Cooker Directions:
Place the chicken and dehydrated mushrooms in the bottom of the cooker. Add the tomatoes with juice, lite coconut milk (or whatever you're using), sherry, and seasonings.

Either chop or slice the cooked butternut squash (with skin for extra fiber) with kitchen shears and add it to the slow cooker. If you do not have precooked squash on hand, add it to the bottom of the slow cooker beneath the chicken since it will take longer to cook.

Cover and cook on low for 6-7 hours or on high 4-5 hours until the chicken is nice and tender. Serve hot with easy coconut rice, over a bed of greens, or drained black beans - whichever suits your tastes.

Skillet Prep:
Coat your large skillet with nonstick spray and add 2 T. virgin coconut oil or extra virgin olive oil. Add the chicken, sherry, seasonings, and squash. Saute over medium high heat for 6-10 minutes until the chicken juices run clear. Add the tomatoes and coconut or other milk and reduce the heat to low. Simmer for about 10 minutes until everything is heated through.

*I used lite coconut milk, but plain or unsweetened hemp, almond, rice, or hazelnut nondairy milks would work fine. If you can eat dairy, goat or cow milk would work as well. In my opinion, either coconut, hemp, goat, or cow milk would work best here since almond and rice milk can be a bit thin. If you are a Celiac and drink rice milk, be careful and check that it is not made with malt (barley). For all of you dairy lovers out there, the goat milk would give this a nice tangy taste so I'd recommend it. The best "milk" options for a low glycemic index and load meal are your unsweetened coconut, hemp, almond, rice or hazelnut beverages. I never recommend soy milk due to the many negative side effects of soy, and dairy options like cow and goat milks have a decent amount of sugar from lactose (~11 g for 1 c. of skim cow milk). It is naturally occurring sugar and isn't that much in the long run, but just so that you're aware. I don't even have that option as I am highly sensitive to lactose and casein.

Cindalou's Kitchen Blues: Healthy Celiac / Coeliac Gluten and Dairy Free Recipes

Kamis, 25 Oktober 2007

Zesty Mustard Squash N' Beef [Paleo] [Low Carb]


This is an improv recipe with discounted end-of-the season yellow squash I found at our local co-op. I just started with the basics (beef, spices) and then added whatever we had lying around, like a small bit of cabbage and some salsa left at the bottom of the jar. (I hate that, by the way; I have this need to use up virtually empty containers). Feel free to adjust the spice - this meal is for me so it is not for the faint of heart.

Please see the note at the bottom for great links on the dangers of high fructose corn syrup. I know that doesn't seem related at all to beef and veggies (really it isn't per say), but it is a very common additive in condiments like salsa, ketchup, and mustard. This is a topic near and dear to my heart as I love salsa. In fact, our "quest to health" began just a few years ago by cutting out all HFCS and corn syrup in our diet. You wouldn't believe where this stuff hides! Jon switched to Rudi's organic bread before we were gluten free, since it is one of the few corn syurp and junk free (but gluten full) breads out there. Anyways, enough about that and onto the beef!

1 lb grass fed ground beef
3 small organic yellow squash
1/2 onion
1/4 head green cabbage
5 sundried tomatoes
1 can chopped green chilies, drained
4-5 T. chunky hot salsa*
2 jalapeños with seeds, sliced
5 cloves garlic, minced
1 small organic carrot
1/4" fresh ginger, minced
~4 T. extra virgin olive oil

Mustard Sauce:
~4-5 T. yellow mustard
2 T. San-J wheat free low sodium tamari

Seasonings:
cayenne pepper
crushed red pepper flakes
Italian seasoning
garlic powder
turmeric
sea salt and pepper

Spray a large frypan with nonstick spray; add the extra virgin olive oil since the meat is very lean and can get tough without a little finesse. Mince the garlic and ginger and add it to the pan. Add the meat, drained chilies, jalapeños, and seasonings to the pan and cook on medium high (this is 5 on our stove for our special pots) for ~ 7 minutes or until the beef is no longer pink. Be careful not to overcook the meat.

While the beef is cooking (keep a relatively close eye on it), grate the carrot, chop the onion, and slice the yellow squash into about 1/4" thick rounds. You can slice the larger squash pieces in half to make them more manageable. Roughly slice or chop the cabbage, whichever you prefer. I used the Saladmaster to quickly grate the carrot and cabbage but you can just use a good kitchen knife.

When the beef is nearly finished (~ 1 minute left), add all the chopped veggies and mix well. Stir in the salsa, mustard, and tamari, then turn the heat to low (or off to save energy) and cover. Let the mixture simmer for 5-10 minutes until the cabbage is tender. If you like your veggies more cooked then this "al dente" style, add them earlier in the cooking process.


*
Watch that your salsas do not have corn syrup or high fructose corn syrup. Both corn syrup and especially high fructose corn syrup (HFCS) have been linked to obesity, diabetes, and heart disease. Some interesting sites on HFCS and diabetes are here:

Weston Price: Double Dangers of HFCS
Weston Price: On Corn Syrup
HFCS: Worse than Sugar?
Defeat Diabetes Site: Study on Corn Syrup and Diabetes
The Washington Post: Sweet But Not Innocent

Our "local" blogging nutrition expert Melissa @ Gluten Free for Good is planning a master post on HFCS here soon. I will also be talking in more detail about this, but seeing as it is almost 10 pm and we're leaving town tomorrow and aren't terribly prepared, I'd better get to packing instead. As a side note, make sure the salsa is gluten free; watch those "spices" and do not hesitate to call the manufacturer.

Cindalou's Kitchen Blues: Healthy Celiac / Coeliac Gluten and Dairy Free Recipes

Rabu, 24 Oktober 2007

Blackberry Banana Danish [Low Fat] [Pareve]

This "danish" is the product of a sick Cindy cooking (Lord help us all). It tastes fantastic, but when I cook while ill and strung out, my recipes are to be used at your own risk :) Joking, but this was originally banana cookies then coffee cake then ... well, we think it's a great danish. It definitely tastes delicious!

I used unsweetened applesauce instead of (vegan) butter or oil so that this recipe is low fat and higher carb for Jon's body type. The whole danish has a total of about 13 g fat from the 1 egg (~4.5 g fat) and the 2 T. shredded coconut. The coconut adds 8 g of the good medium-chain triglycerides. Remember that coconut provides "good" saturated fat and thus boosts your metabolism and immune system. Since coconut is a MCFA (or Medium Chain [Saturated] Fatty Acid), then it is preferentially burned by your body for energy rather than becoming fat storage. Traditional corn and soy vegetables oils consist of longer chain unsaturated fats. Unlike coconut, these oils are less likely to be immediately burned by the body and are preferentially stored as fat (except olive oil which has many health benefits). In general, any calorie excess is stored as fat, so just remember to stay active on a daily basis (I say this as I have slept, cooked, and typed all day :P).

This recipe makes a large danish with about 6-8 servings depending on how you slice it. This means that there is less than 2 g fat per serving, although I make no such bold claims about the carbs here since we all know that low fat and fat free means either high carb or chemicals (or water, as Jon pointed out) :)


Dough:

1 c. gluten free all-purpose baking mix
1 T. organic brown sugar
1 T. organic turbinado raw sugar
1/2 c. unsweetened apple sauce
1/4 c. water
dash sea salt
2 t. cinnamon
1 t. (drizzle) organic maple syrup (optional)
1 T. xanthan gum
1 free-range fresh egg or egg substitute

Filling:
1/2 c. unsweetened all-natural blackberry jam
2 bananas, sliced
2 T. organic no sulfur shredded coconut
cinnamon, for topping and filling to taste

Preheat the oven to 350 degrees and set aside the egg. Mix all of the dough ingredients in a medium bowl. Spread half of the dough evenly across the surface of a greased cookie sheet. Gently spread the jam over the dough on the cookie sheet with a butter knife. Sprinkle over the coconut flakes and sliced bananas as shown below.


You can drizzle this with a bit of organic maple syrup if desired. Use the rest of the dough to top the danish, spreading it gently over the bananas with a spoon and knife. Sprinkle the top with cinnamon and bake at 350 degrees for 27-30 minutes or until the dough is cooked.

If you can do dairy then this would be great either topped with cream cheese or with a cream cheese and kosher unflavored gelatin mixture in the middle for a cheese danish style treat. I'll probably do this sooner (rather than later) since Jon loves these kinds of desserts.


Selasa, 23 Oktober 2007

Bison Spinach Pot Pie [Paleo] [Low carb]


Eugh (my new favorite obnoxious word)! I am still ill; I seemed to have picked up some crud walking around in the cool rain at Yale. My coworkers all seem to have a similar cruddy wipe-you-out-a-Mac-truck-just-hit-you sniffle too. Running around on that crazy schedule and different diet must have lowered our immune systems enough to catch the crud. Joy. Anyways, since I am at home and feeling crappy, I have been thinking of a few relatively easy recipes that will help heal and get me back on my low carb, dairy, gluten, egg, soy, nut, corn, potato, rice, and tuna-free diet. I have bison in the fridge - which I adore - but I've been getting a bit bored of the usual spicy meat, sundried tomato, collard, red cabbage, and kale sautees for lunch. I racked my brain for Cindy-edible, yummy, healthy, low carb, ground meat meals. I know what you're thinking: "well that ought to be easy, you do it on a daily basis!" Hey, it's hard to get back into the swing of things when you're feeling monkey-stomped and spoiled from a week of no-kitchen-available dining out :)

Karina, since you're on a similar diet and are reliant on Steve and others to help out, I was really hoping that this recipe would be okay for you and easy enough that someone could prepare it for you. Steve's smashed potatoes and meatloaf must have penetrated my brain as I slept, dreaming of sugar plums and ... bison? Well, this is an attempt to contribute. I'm sure you have similar recipes and food already :) Personally, I'm bored with meatballs, sauteed meat, burgers, etc; I wanted a nice thick slice of meat pie. ~smacking lips vigorously~

You can use grass fed ground beef, ground lamb, or venison if you'd like, but all I have right now is bison.

Vegan Low Carb Garbanzo and Flax Pie Crust*:
1/2 c. garbanzo flour
3/4 c. ground flax seed
1 T. xanthan gum
1 T. extra virgin olive oil
1 c. water
oregano
sea salt

Mix everything thoroughly in a mixing bowl until it becomes a thick paste. Spray an 8" pie plate with nonstick cooking spray. Put the dough in the middle and form a crust with your mixing spoon by pressing the dough into the bottom and sides of the pie plate. Bake at 400 degrees for 25 minutes. Let cool completely. We used this as the crust for the meat pie, but it is also a great crust for pies if you switch out the spices, as in my Vegan Flax Pie Crust used in this delicious Low carb pumpkin pie.


* You can use any crust you'd like (or none at all, but I think it'd be a bit runny and fall apart without a crust). Gluten Free Bay has been on a delicious looking pie extravaganza lately and he uses the Natural Feast brand gluten-free frozen pie crusts, I believe. Gluten free bakehouse also makes pie crusts in the frozen section of Whole Foods, but I am not sure as to their kosher status since I don't use any premade crusts at this point. If you have allergies or suspect issues with flax, then I'd go with these premade crusts or no crust.

Bison and Spinach Pie Filling:
1/2 lb grass fed ground bison
1/4 lb frozen (or fresh) spinach
3 unsulfured sundried tomato pieces, chopped
3 cloves fresh garlic, minced
1/4" chunk fresh ginger, minced
1/4" chunk fresh horseradish root, minced
1 small jalapeño with seeds, minced
1/4 onion, chopped
1/4 organic carrot, grated
1/2 15 oz. can drained* Muir Glen fire roasted organic diced tomatoes with green chilies
1/2 small can green chilies, drained
1/2 T. hot sauce or to taste
optional drizzle of organic maple syrup or agave nectar to contrast the spice
~3 T. extra virgin olive oil
1 can whole green chilies, halved to layer on top

*I recommend saving the juice for another occasion like soup or as a nice liquid kick for scrambled eggs or sauteed veggies.

Seasonings:
garlic powder
oregano
parsley
fresh basil leaves, chopped
rosemary
cayenne pepper and/or crushed red pepper flakes, optional

Dairy Free "Shepard's Pie" Variation/Additions: (I didn't use these this time, but I will in the future)
1 T. xanthan gum, to thicken the mixture into a set "pie"
1 T. Earth Balance Vegan butter
1 c. mashed and cooked cauliflower or the typical not low carb mashed potatoes option (we're out of cauliflower too)

Preheat the oven to 350 degrees and get out either your prebaked and cooled flax and garbanzo crust or your other premade pie crust. If you are choosing not to use a crust, then liberally coat the pie plate with nonstick olive oil spray. Be aware that not using a crust may mean that the filling just falls apart; the no-crusters might want to add an egg or two to keep everything together (but I didn't use eggs here).

Spray a large skillet with nonstick spray and add the olive oil, chopped onion, minced garlic, ginger, horseradish, and the bison. Turn to medium heat (5). Season and crumble the meat as it browns. Cook for about 5-7 minutes or until bison is almost done - remember not to overcook the bison since it is so lean and will become chewy.

After chopping/mincing the carrot and jalapeños, stir them into the bison in the last minute or so of browning. Stir in the drained fire roasted tomatoes and mix well. You can either mix in the frozen spinach or you can save it for a topping layer as I did; it doesn't matter. Fill the crust with the bison veggie mix and top with the spinach (if you didn't mix it in already) and layer the whole green chilies over the top.

Bake the pie for about an hour at 350 degrees. Let cool completely, then slice and serve with a nice side salad or light vegetable broth soup.


bison lovin' by the slice


swirls of spinach in a close up side view

Cindalou's Kitchen Blues: Healthy Celiac / Coeliac Gluten and Dairy Free Recipes

Senin, 22 Oktober 2007

Hemp Bliss Coupon Expires Oct 31

Manitoba Harvest sent out a hemp milk coupon for those of you allergic to soy, milk, almond, hazelnut, and most available creamy milks. Hope this comes in handy - enjoy!

Love
Bliss?
Save 20%
We cannot ship Hemp Bliss direct to customers in the winter months (November - March) as it will freeze in the UPS truck. We are clearing out our direct warehouse with a one time 20% off special.
CLICK HERE to visit our store and use coupon code 3Blisspacks
"lovebliss" at check out to
receive your 20% off.
Hemp Bliss has a one year shelf life and can be stored in your pantry. Stock up now and prepare for winter.
Offer Expires: October 31, 2007 COUPON CODE "lovebliss"

Minggu, 21 Oktober 2007

Gluten and Dairy Free at Outback: It's a Go!

Hey everyone, sorry it has been so slow here. I just flew back from New Haven (CT) last night and we treated ourselves to Outback Steakhouse's Gluten Free Menu as a Cindy-coming-home reward and Cindy's-too-durn-exhausted-to-cook-breathe-or-think reward.

I am still struggling with being glutened and dairied over the past few days. I was glutened @ Gourmet Heaven (I'll explain in New Haven restaurant reviews, Part Dos) and the Philly airport (chock full o' gluten and dairy and, to add insult to injury, wildly expensive), and dairied at Outback (my oops).

I am thankful that the worst I have to deal with right now are these bad reactions whereas Karina is undergoing a much more arduous healing process with her recent fall. Goddess, we have you in our prayers for fast and optimal healing. Blessed Be! I am very motivated to get back to my weight lighting and exercises now and get refocused.

Review: Outback Steakhouse and their Gluten Free Menu @ Chapel Hill NC


The Outback dairy deal was my fault since I was already tired, sick, and not thinking straight. I ordered the gluten free "Chocolate Thunder From Down Under" flourless brownie with the ice cream on the side at Jon's insistence, not realizing that flourless and gluten free means full of dairy. Delicious, wonderful, scrumptious dairy-full deatheningly sweet brownie. Hey, if you can do dairy, I highly recommend that brownie :) It does have a lot of sugar and glycemic impact though; try to share it (I ate most of it, hehe).

As for the Outback gluten free experience, we had to wait forever(t'was Saturday night), but the wait staff seemed conscientious and positive about my gluten free requests. It was pretty obvious that they'd heard the buzzwords and had probably had training with how to deal with allergic customers. I felt comfortable with our main waiter, although he was extremely busy and swamped by a nearby crowd of 15 undergrads drinking beer and tossing pumpernickel bread rolls across the tables. The assisting servers, however, were less comforting. For example, when my gluten and dairy free salad came out covered in cheese and I politely pointed it out, the second server was immediately apologetic and made a fuss, saying "Yes! Of course, this was a gluten free salad - I'm so sorry it has cheese!" over and over.

I smiled since at least I'd get a new salad. Jon about fell over saying "dairy, not gluten... dairy." I was actually humorous and I was thankful that they cared and were so proactive. I ordered the Outback Special Steak with steamed vegetables, and a side house salad with oil and vinegar dressing. (David, if you're wondering they do not have olive oil. I have not been to a restaurant as of late which does, unfortunately.) The steak was perfect and the vegetables great; no gluten or dairy problems there. I feel completely comfortable eating at Outback (at least ours) now, which is a relief. Overall, if you're interested in the gluten free options at Outback, I say go for it and be sure to be upfront with your requests (no croûtons, etc). With the exception of the dairy in the brownie, our experience was positive. Just be ready to shell out the $$: we spent a good $45 for my steak meal, Jon's steak griller, and our shared dessert. Hey, it was the first fancy date we've had and it was worth it. I am spoiled by not cooking all last week, let's hope I get over that soon :)

Cindalou's Kitchen Blues: Healthy Celiac / Coeliac Gluten and Dairy Free Recipes

Jumat, 19 Oktober 2007

Sweet Potato Fruit and Nut Casserole [Vegan]

This delicious fall casserole-dessert (whatever you call it - casserole with an identity crisis? Vegetable, fruit, sweet or side dish?) is another meal that I baked up right before I left for my trip last week. Jon is munchin' down on this guy as we speak and I am stuck in a cold underground lab grumbling about not being able to have scratch-n-sniff computer pictures. I can't eat the food from a couple hundred miles away, but is it too much to ask to just be able to smell it?! Come on, all this technology for nothing. Well, I suppose if you're reading this and you're not Jon then we're in the same boat ... a leaking canoe, I think. Getting back to the recipe at hand, this is a great everyday or holiday side dish or dessert base. I always serve it at Thanksgiving, Solstice, and Christmas, but it isn't restricted merely to holidays.


3 large sweet potatoes
2 c. pulp unsweetened orange juice
1/2 stick earth balance vegan butter
1 10 oz. can unsweetened crushed pineapple with juice
4 organic carrots, grated
1/4 c. shredded coconut (optional)
1/4 c. sunflower seeds
1/2 c. raisins (or cranberries or currants)
2 T. cinnamon
1 t. nutmeg
1/4 c. ground flax seed
1/2 c. raw unsalted walnuts or mixed nuts (optional)
dash sea salt
1/4 c. organic or natural brown sugar (optional)

Heat the oven to 350 degrees and coat a large baking dish with nonstick spray. You can use canned sweet potatoes if you wish, but be careful to buy just the sweet potatoes (yams) and not the presweetened sugary yams. We microwaved our potatoes in a big glass-lid covered Corningware container until they were fork tender. I then added the earth balance vegan butter to the potatoes and heated it all in the microwave for another minute or so to soften the butter.

If you have a Corningware container large enough, this could be a one dish meal. Ours' is tiny; I had to transfer everything to a large mixing bowl and then to a sprayed Pyrex baking dish for cooking. However, if you have a huge Corningware, feel free to mix and bake it all in that one dish.
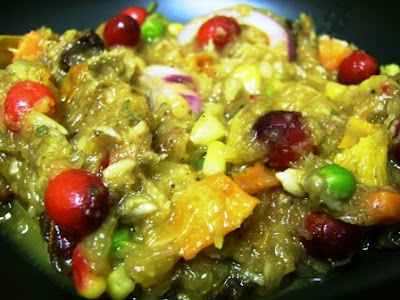
Either in your mixing bowl or in your Corningware, add the pineapple with juice, orange juice, sea salt, and brown sugar (if desired- you can also use agave for a lower g.i. or just leave it all out entirely). I used the Saladmaster to quickly grate up the carrots into a fine grate and added them to the potatoes. You can grate them by hand or use a food processor, it doesn't matter. Mix everything together and mash the potatoes with skin as you go, folding the pineapple and carrots into the mix with each turn of the spoon. Keep the skin - it adds the vitamins and fiber from the potatoes and doesn't obscure the texture or taste of the dish. Skin haters will barely know it's mashed up in there :)

Grind the flax seed with a blender (the Vita-Mix) or a small coffee grinder. Add the flax, spices, seeds, and raisins or other dried fruit (apricot cut into tiny pieces would go well) to the mix and stir. If you want to add the coconut and walnuts, then add them now and mix everything together.

Transfer everything to your baking dish (if not already in your large Corningware) and bake in the oven for 30-40 minutes or until heated through. This is a classic recipe my mom used to make when I was a kid, except I've added a lot of extras and left off the marshmallows and sugar-nut topping she used to make. If you have kids, the marshmallows are always a favorite, but you should be wary of extra simple sugars and non-gf-marshmallows. Truthfully, I don't eat them so I don't know if they are gluten free (though that should be easy to determine). Sweet potatoes in and of themselves are considered low g.i. (I consider them medium for my body's metabolism) and they are one of the fall superfoods along with cranberries, pumpkin, and turkey (all low carb). I don't have a need to add the marshmallow or nut topping since I love this casserole as is. However, if you're curious about the nut topping, it is not my own recipe but an old classic and is as follows:

Sweet Nut Topping:
1 c. walnuts and/or crushed pecans
1/2 stick earth balance vegan butter
2 T. organic or natural brown sugar
1 t. cinnamon

Melt the vegan butter in a small microwave safe bowl. Next, mix all topping ingredients together in a small bowl. Spoon the topping over the potatoes in the last 15-20 minutes of baking and bake until the topping is hot and a little crispy. Serve hot.


Cindalou's Kitchen Blues: Healthy Celiac / Coeliac Gluten and Dairy Free Recipes

Fruit and Rice "Pudding" Porridge [Vegan]

Okay Michelle (M), this is the whole-rice-in-the-porridge post I was talking about. Sorry it has taken me so long to put up. I actually made this for Jon last weekend before I left, but I've been slacking and haven't made time to finish up my old recipes ~sheepish grin~ Here's to enjoying what Jon has already devoured! This makes a great, hearty porridge or even a rice pudding dessert. Go crazy and add in any dried or fresh fruit and nuts (if you can eat them) that you prefer.


~7 c. water
1 c. ground flax
1/2 c. organic short grain brown rice*
1/2 c. organic long grain brown rice*
1 10 oz. can crushed unsweetened pineapple with juice
2 T. organic small red dates, pitted
3-4 T. sunflower seeds
1/4 c. shredded organic no-sulfur coconut
1/4 c. fresh cooked or canned pumpkin
1/4 c. cranberries (fresh or frozen)
1/4 c. raisins
2 T. natural brown sugar (optional)
1/2 c. walnuts (optional, omit for nut free)
1 t. sea salt

Seasonings:
2 T. cinnamon
1 t. nutmeg
4-5 whole cloves

*Brown rice has a glycemic index around 57 where white rice is 88, much too high for even people without insulin problems. The lower g.i. and glycemic load of brown rice makes it a preferred diabetic and general rice option. White rice, parboiled, instant, and sweet rice should all be avoided when possible. This also goes for the lovely gluten free rice flours and premade gf mixes out there - you should really limit your exposure to the white, sweet, and refined rice products. Try brown rice or buckwheat flour instead; add a little extra aluminum-free baking powder to help your baked goods rise since these flours are a slightly more dense than their white and refined counterparts.

This recipe is similar to our Rice and Flax "Oatmeal" Porridge. For this recipe, only grind the flax. We use a dry blade Vitamix container which takes about 15 seconds to pulverize flax seed. Adjust the grind to suit your tastes. Place the resulting meal in a crockpot or pot of choice and add raisins (cranberries, currants), nuts, seeds*, and milk. Stir and add spices to taste. I use a LOT of cinnamon (also helps with glycemic index and insulin levels), nutmeg, and cloves. Add water or more milk until mixture is very watery, keeping in mind that the flax will absorb much of the water before the rice even gets a chance to cook. I use ~5 cups of water initially and stir in another 2 as the porridge cooks. Cook on low anywhere from 3-8 hours. I have found that I could not overcook the porridge as long as I added water when needed).

*seeds such as sunflower seeds provide good omega 6 fats to balance the omega 3 fats from the flax.

Serve hot or cold (best hot), topped with fresh banana, blueberries or other seasonal, local fruit. Jon likes some natural brown sugar in it as well, though agave nectar or honey work also.

**Be sure that your brown sugar is REAL and not just white sugar with molasses added. We use organic brown sugar since it is "real," but the Whole Foods brand natural (not organic) brown sugar is also "real"**

Yield: way to many bowls! In fact, we actually made too much - our small crockpot overflowed a bit. If you are worried about the size of your crockpot, keep it on the safe side by adding and stirring the ingredients slowly. Since the flax absorbs the water, you will initially want to stir and add water every ~20 minutes (so make sure you have enough room for water :). This stuff lasts forever. It's a great family breakfast that is easy, healthy, GF and DF, and budget friendly! Reheat leftovers for quick breakfasts (or great dessert base) in the microwave. I made this since gluten free oats and other commercial gluten free cereals (millet, white rice, tapioca, etc) are pricey or choc-full-o' sugar or high glycemic grains only. I want to control the glycemic index of what we eat; many gluten free items are sky high in glycemic impact and actually WORSE for you than white bread (see The International Table of GI and GL Values for a downloadable Excel file with glycemic indicies (GI) and loads (GL) ). Millet is a good example of an extreme g.i. and g.l. gluten free food. It is gf and healthy, except that it has a very high g.i. and would need to be cooked or served with a large amount of healthy fat and protein to lower the g.i.

Kamis, 18 Oktober 2007

Yale and New Haven, CT Restaurant Reviews: PART I

Okay, since I spent all week up here at Yale eating every single meal out, I thought I'd pass along the info about the availability of gluten, dairy, soy, nut, corn, and egg free dining. As an aside, can I say "Eugh!" Eating out this often is just not me! We "usually" only eat out about once per 2-3 months (if you don't count coffee). You can make healthier and much cheaper food at home. Honestly, I don't know how the "average" American does it with all their fast food and eating out "treats." Anyways, this is not a pretty post, just an informative one. I tried to contact the Celiac support group here in New haven a good week before my trip, but they were busy and didn't get back to me about recommendations until yesterday. For all of you who have been counting (I guess that's only Jon, ha ha), I have already been here almost a week. Their one recommendation was a tad late. Thanks for the help though guys - better late than never!

The following lists the restaurants at which I ate, what I ate, the price for my food and the general price range, the service, the management attitude towards my questions, and any ill effects I had from misadvertised food. Yes, Karina, I did get sick a few times but not nearly as bad as you so I'm counting myself lucky!

Favorites:
El Amigo Feliz, Mexican
This is a tiny hole-in-the-wall looking bright yellow shack right next to the Marriott where we were staying. Quite literally this was a 5 second walk and it is very convenient since it sits right at the intersection of Broadway, York Street, Tower Street, and Whalley Avenue. I love run-down looking mexican joints since they always seem to have the best and most authentic food.

First Impressions: Good, expansive menu. I could find 7 dishes listed which I could eat or easily modify. Their price range was anywhere from $6-$25 depending on how fancy you want to get. I decided to splurge a little and got something different since I wasn't the chef. A customer hanging outside smoking (since all restaurants here are smoke free) raved about the place so I decided to try it out. I walked in and was quickly greeted and seated. The waitress was wonderful; she was very response as I scanned the menu and asked recommendations. I was eyeing the fajitas, but I am always wary of contamination with the (flour) tortillas, "spiced mexican" rice, and lord-only-knows what's in those beans and guacamole. However, she was great! As I explained that I couldn't eat blah-blah-blah, she shook her head and quickly suggested corn tortillas, minus the dairy, and extra salsa. I was stoked, this was starting off on a good foot. Now, for the food:

The Meal:
I chose beef fajitas, no dairy, extra salsa, and corn tortillas (which I did not eat but it made me feel better that they wouldn't accidentally handle and serve wheat flour tortillas if I wasn't ordering something different). It was a little pricey for me, but $14 is not atypical for a fajita meal which includes the canonical meat, onion, peppers, tortillas, and a plate of spiced mexi-rice, refried beans, lettuce, pico de gallo, guacamole and sour cream/cheese (which I left out).

It was done quickly since the restaurant was not crowded (~10 minutes). The meal came out sizzling and smelling fantastic, though I know that was vegetable oil and not coconut or olive oil used in the frying :) Oh well, you can choose your battles and a few meals of vegetable oil won't kill me ... I hope, lol. It was hot and fantastic! There was not a scrap of dairy or (obvious) gluten anywhere. The tortillas were piping hot steamed corn tortillas. The meals was colorful, hot, and fresh. I eyed the rice ominously since I am wary of the "spice" in mexi-rice laced with peas and real roasted carrot chunks. I felt adventurous and starving so I chowed down. As advertised, there was indeed no gluten in the spice since I did not get ill in the slightest. Of course I had the usual "you fat pig you ate all that Mexican and now you're gonna pay" gas from the beans, rice, and general gluttony in which I indulged. It was great - the meat was lean and not very greasy, surprisingly. I was expecting greasy everything and contamination everywhere, but I found my meal to be safe. The waitress was very attentive and came over multiple times to make sure it was all okay and I was feeling well.

Summary: Overall, this is not a "gf safe" per say restaurant - at least it doesn't advertise itself as such, but I had a fantastic meal with a very responsive, helpful, and enthusiastic waitress. I'd eat there again and again without reservation. I highly recommend this place if you like Mexican (and I don't mean Ameri-Mexi). In fact, I have 6 more dinners to try! Ahh, what a wonderful curse. I had NO bad food reactions at all.

Royal India, Indian
This tiny Indian restaurant is right around the corner from El Amigo which makes it a ~7 second walk from the hotel. It is a converted narrow townhouse, as are many local restaurants here in New Haven. A menu was posted outside along with the lunch buffet special prices. The menu got a little pricey since dinner is a-la-carte (not buffet) ranging from ~$7-$35 for fancy lamb and duck type entrees. I stalked the place for a good day or so but they were closed on Sunday until dinner. I didn't want to spend quite that much so I held out for a future lunch buffeting (that's a technical term). I did con my coworkers (that's you, Claudio and Rich!) to join me for a lunch buffet the following day - we were all very pleased. The problem with a buffet is that I'm a pig ... seriously, I think the server's eyes were going to bug right out of his head when he saw how much I ate :P

First Impressions: Walking in, it smelled like heaven and was very pristine and clean like most Indian restaurants. The small buffet in the middle of the tiny room was playing the scent of 'my tummy in love', by Cindalou.

The Meal: The buffet was an allergic consumer's dream, or at least a big relief, since each dish had a cover, dedicated spoon, and label with title and ingredients. With the exception of one spice, the ingredients were conspicuous and delicious. I chose the following: Tempura fried cauliflower appetizer, lots of spicy red hot chili oil/sauce for dipping, some plain basmati rice with peas, some yummy vegetarian coconut curry (I don't know the exact name), tandoori roast chicken with onions, a chicken and veggie creamy (coconut, nondairy) curry, steamed veggies, and a ton of creamed (coconut? I asked, it was nondairy) spinach with tiny potato chunks. Dessert was a few fresh tomato slices, and various pieces of fresh fruit. Basically, to go gf df, etc, I just didn't eat the bread, the yogurt dipping sauces, or the one dairy dish (that's one of about 10 dishes which did have dairy, pretty good odds!). Maybe some of you out there know the actual dish names, I forget. Anyways, I ate huge plates of seconds and then some. It was all hot, fresh, and absolutely the best Indian food I've ever had. I didn't even miss the bread! The lunch buffet was $7.95 so with tax and tip I spent $10. It was well worth it since I was stuffed the rest of the day, but a good stuffed, not the sugar crash or bad stuffed.

Summary: Excellent and affordable Indian buffet. The waiters were ok but eyed me suspiciously. The food was great and authentic and I did not get sick at all. Horrah! I wish the staff had been more friendly. I also would have liked to try the fancy lamb dish, though the buffet was great and within budget (especially since it was basically lunch and dinner). I am starving now and their buffet for lunch tomorrow sounds tempting.
Okay. This is really long already so I'll continue this review in a few more posts, but the coming attractions (so far) are : Recommended: Gourmet Heaven**, healthy variety (like a very small Whole Foods), and Bankok Garden, Thai. So far, the Not recommended crowd is not a crowd at all: The Whole Enchilada, Healthy American-Mexican with lots of lean meat, organic type options (sounds good...I'll explain)

** Careful, I did get dairy sick a few times but I can explain that later.

Cindalou's Kitchen Blues: Healthy Celiac / Coeliac Gluten and Dairy Free Recipes

Selasa, 16 Oktober 2007

Vegetable Lentil Stew [Vegan]

Healthy Vegetable Lentil Stew

1 c. organic dry lentils
3 c. frozen mixed veggies
1 c. water
sea salt and pepper
1 15 oz. can no salt organic diced tomatoes with juice
2 organic carrots
6-9 sundried tomatoes, chopped
3/4 c. shredded red cabbage
1/2 c. shredded green cabbage
1 jalapeño with seeds, chopped
1/4" chunk fresh horseradish, minced
2 T. extra virgin olive oil
1/2 can (7 oz ) drained organic great northern beans (optional)

Seasonings:
garlic powder
Italian seasoning
oregano

Combine dry lentils and water in bottom of your slow cooker or a large pot. Add in the frozen mixed veggies, the tomatoes with juice, extra virgin olive oil, and sundried tomatoes. Use your food processor (I used the Saladmaster) to grate up your carrots and cabbages. Add these to the pot along with the sea salt, pepper, and all spices. Chop the jalapeño (or mince with your food processor) and add it along with the seeds to the pot. Mince the fresh horseradish and add it to the rest of the ingredients. You can toss in any other veggies or seasonings which appeal to you. If you have a bit of a sweet tooth, some raisins, cranberries (fresh, frozen or dried will all work), currants, anise seeds, or perhaps some dried apricots or frozen peaches would also give this stew a nice contrast.

If you're suing a Crockpot, set it to low and cook for 8-10 hours (or high for 5-6 hours). This makes this dish great for long workdays or Shabbat. If you're cooking it all on the stovetop, bring it to a boil for about 20 minutes, then reduce it to a simmer for another 25-35 minutes. You can chose to just boil everything for 30 minutes according to the lentil directions. Careful though, as this may make the vegetables too mushy. Cook until the lentils are soft and feel free to adjust cooking times so the vegetables are tender to your liking. If you like crisper vegetables, then add them in after 20 minutes of boiling (for the stove top).

Anise seeds, otherwise known as sweet cumin, are excellent for digestion and immunity. These great tiny gray seeds are often served as "aftermints" at Indian restaurants as a digestion aid and breath fresher. Be cautious with anise seeds if you are taking iron supplements, blood thinners, or if you have an inflammatory skin condition. More information on anise seeds, their history, and health benefits is here. Be cautious taking iron supplements (or using a cast iron pan) at all if you are pregnant or nursing since iron poisoning is one of the leading preventable causes of infant death.

On a more positive note, you all know I love lentils! They provide a great vegetarian (and vegan for that matter) source of protein and dietary fiber with very little to no fat. I often cook with lentils and have a variety of vegetarian soups or meat-based soups, stews, and casseroles with lentils. You can even find decent lentil pasta which is wheat, gluten, dairy, soy, corn, etc free at Whole Foods or your local health food store (or online, jut watch the shipping cost). I like the pasta since it is a high protein and lower net carb pasta option rather than brown rice pasta. However, with all of these pastas be careful not to overuse them since they are a form of processed food. Think: lentil and rice (or wheat for that matter) pasta doesn't grow naturally in the fields! It is always better to stick to the most natural, unprocessed, and raw foods like real lentils over pastas and such. That being said, these pastas do exist and are good. They are a nice rare change on pasta night and will be a hit with the family. Alright, enough chatter - munch on!

Healthy Lentil Stew Recipe
Cindalou's Kitchen Blues: Healthy Celiac / Coeliac Gluten and Dairy Free Recipes

Minggu, 14 Oktober 2007

Asparagus and Basil Soup [Vegan] [Paleo] [Low Carb]

It was that time of the week again. Last Friday, it was my (Jon) turn to make dinner. As it turned out, I got away with making a soup and putting together some leftovers. Keeping in line with my previous dinner ( Seared Sashimi Tuna ), I got the idea for this soup from Alisa's Asparagus Soup w/ Wild Garlic @ Go Dairy Free. Check out my gluten free, dairy free, vegan low carb, etc asparagus soup below!


2 c. low sodium organic vegetable broth
2/3 c. dry white wine
8-10 fresh basil leaves, chopped
4 cloves fresh garlic
3/4" chunk fresh ginger
~1 lb (bundle) fresh asparagus
2 T. extra virgin olive oil

Seasonings:
1 t. gluten free "It's a Dilly" salt-free dill and lemon seasoning
sea salt and pepper
2-3 squirts lime juice

Optional:
2 T. organic hemp protein powder

Once all of your ingredients are in order, start by chopping the tips (~ 1") off your asparagus. I used these later for garnish and texture. Cut your remaining asparagus into ~ 2" sections. To soften, you're going to steam these sections for about 5 minutes. I steamed the asparagus (as opposed to boil) because I wanted to retain the nutrients and color. Fill your Vita-Mix (or other blender) with vegetable (or chicken) broth, white wine, garlic, ginger, olive oil and seasonings. Add all (depending on the strength of your blender) the steamed asparagus and blend. With a Vita-Mix, you can blend until the soup is hot and steamy. If your blender cannot heat, puree the asparagus soup ingredients and warm in your microwave. Once steamy, drop in your asparagus tips and chopped basil leaves.

For an optional protein boost, stir in hemp protein powder at any time during preparation. Serve hot and enjoy :)

Makes 5-6 cups (2+ large bowls).

Cindalou's Kitchen Blues: Healthy Celiac / Coeliac Gluten and Dairy Free Recipes

Sabtu, 13 Oktober 2007

Roasted Pumpkin Veggie Stew in/and Shell [Vegan]

This is the last recipe I can pump out before I crash into bed here soon to ready for my 4 am waking-eugh! I must have had way too much espresso at work when I requested a 7 am flight to Philly and then a 9 am Cessna 'hop' to Yale. This is especially true considering our airport is 45 minutes away as is! Silly me. At least I won't be writing a grumpy 3 or 4 am post for you all tomorrow. I'll save you the misery :)

Fresh pumpkins are in high season here in North Carolina, so it's uber easy to find delicious fresh local pumpkins. Shopping local has may benefits such as the food being fresher, supporting the community in which you live, and reducing pollution from transportation costs. I always loved the slogan "Spend it here, keep it here"... that should be applied more in everyday life and especially the government! [Vote Ron Paul! :) and eat more fresh, local produce]

Gluten and Dairy free Pumpkin Vegetable Stew

2 medium fresh pumpkins
2 stalks fresh organic celery, chopped fine
1/2 medium onion, chopped
2 organic carrots, grated fine
1/3 lb. frozen vegetable soup mix veggies or 1/3 lb. frozen green beans and peas
1 c. unsweetened organic pineapple juice
1 c. unsweetened organic orange juice with pulp
1/4 c. fresh or frozen raw cranberries
2-3 1/4" slices red onion
1/4 c. organic raisins
1/4 c. no-sulfur organic shredded coconut (optional)
3 cloves fresh garlic, minced
1/2" chunk fresh ginger, minced
2 T. extra virgin olive oil
natural brown sugar to taste (optional)
1/4 c. sunflower seeds

Optional Substitute for Fruit Juices (low carb):
1 c. low sodium organic vegetable broth (or more water)
1 c. water

Seasonings:
2 T. cinnamon
5 whole cloves
sea salt and pepper
garlic powder
oregano

Variations:
1 can organic black beans or lentils, drained

Preheat the oven to 350. Slice the top off the pumpkins, as you would for a jack-o-lantern type pumpkin. Scoop out the seeds and set aside. Rather than discard the seeds, we roasted and added some of them back into the stew and reserved the rest for salads. Place the pumpkins face down in a Pyrex baking dish filled with about 1/2" water. Bake the whole pumpkins for about 40 minutes at 350 degrees.

When the pumpkins are finished, remove them from the oven and check that they are fork tender. Let the pumpkins cool for a few minutes. Flip over the pumpkins and spoon/scrape out the meat into a large mixing bowl. You can try to preserve the cooked pumpkin shell and serve the cooked stew inside the shell, or you can just mash it all up together. I love the texture and taste of roasted pumpkin and acorn or butternut squash shells. They are completely edible after they've been washed and cooked and they provide great vitamins (hence the vibrant orange color) and fiber. I am tired and lazy so I just mashed my shell right into the rest of the pumpkin.

Add your chopped onion, drained black beans or lentils (if you're using them), and a handful of raw or roasted seeds into the mixing bowl. Mix in the extra virgin olive oil, sea salt, pepper, and all other seasonings. For a hint of sweetness, add a tablespoon of natural brown sugar if desired. Mix well.

Add in the celery, carrots, vegetable mix, raisins, coconut, cranberries and liquids (juices or broth) and mix thoroughly. Transfer the stew mixture to a large saucepan (pot) and let simmer over low heat for about 20 minutes or until everything is heated through. You can also use a Crock pot if you want- they warming method is completely up to you. When everything is warmed, get ready to serve the stew. If you preserved the shell, spoon the mix back into the pumpkin shells for serving. If not, just serve as is (delicious, of course).

Dairy and Gluten Free Pumpkin Soup
Cindalou's Kitchen Blues: Healthy Celiac / Coeliac Gluten and Dairy Free Recipes